
In the hustle and bustle of city life, small apartments have become the norm. The bathroom is often the smallest but most functional space in the entire apartment. Studies show that the typical bathroom area in a small apartment is approximately 36–40 square feet (about 3.3–3.7 square meters) .
Even with only about 3 square meters, efficient circulation and maximized furniture space can be achieved with a reasonable layout and precise furniture selection . This article combines ergonomics, design principles, and practical examples to help you renovate your small bathroom from four aspects: layout, furniture selection, storage systems, and visual space-expanding techniques .
I. Starting point of the renovation: balancing functionality and comfort
Respect for ergonomics
Renovating a small bathroom shouldn’t involve blindly cramming in features. According to design data, the recommended passageway width is at least 60 cm , and there should be at least 70 cm of space in front of the sink . Furthermore, the minimum usable bathroom area is generally considered to be approximately 40 square feet (about 3.7 square meters) .
These seemingly simple “basic dimensions” directly determine the comfort and safety of use.
Dry and wet separation should not be ignored
Even in a compact space, it’s recommended to stick to a “wet and dry separation” design. Studies indicate that proper zoning can increase bathroom space utilization by approximately 30% .
Real-world examples show that successful small-apartment bathroom renovations generally follow the “flowing space” concept: seamless transitions between functional areas, avoiding unnecessary detours.
II. Layout Optimization: The Golden Rule of Triangular Movement
An ideal bathroom layout is: sink → toilet → shower area , forming a “traffic triangle”. This layout reduces unnecessary movements and increases efficiency by about 20% .
Three classic layout schemes:
Linear layout : Functions extend along one wall, suitable for long and narrow spaces.
L-shaped : Arranged along two walls, suitable for near-square spaces.
U-shaped : Functional areas are arranged on three sides, with a passageway on one side, suitable for slightly more spacious small apartments.
After proper layout, you’ll find that the space “becomes larger,” rather than “fewer functions.”
III. Furniture Selection: Wall-mounted + Multifunctional = Space-saving Solution
Wall-mounted furniture has obvious advantages
Using wall-mounted sinks, toilets, or cabinets can save about 15% of floor space, making the space look lighter and the floor easier to clean.
A selection of multifunctional furniture:
Folding shower doors: save space when opening and closing.
Mirror cabinet combination: mirrored surface + concealed storage.
Built-in washbasins: reduce protruding parts.
Retractable partitions: Dry and wet areas can be flexibly divided as needed.
Size reference:
It is recommended that the depth of the washbasin be controlled at 40–45 cm , and the thickness of the storage cabinet should not exceed 20 cm . These details can free up more usable furniture space in a limited space.
IV. Storage System: Vertical space development, maximizing storage and ease of use.
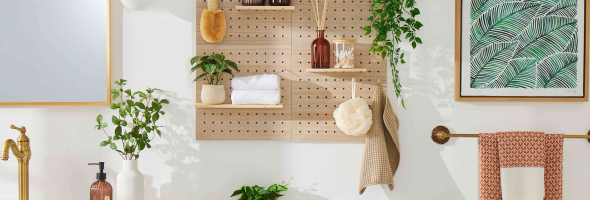
Wall-mounted “3D storage”
Wall space is the most valuable storage resource in a small bathroom. We recommend using it in layers:
Top layer: Spare tissues, cleaning supplies.
Middle layer: Daily necessities such as toothbrushes and skincare products.
Bottom layer: Large items such as shampoo and shower gel.
Utilize corners and gaps
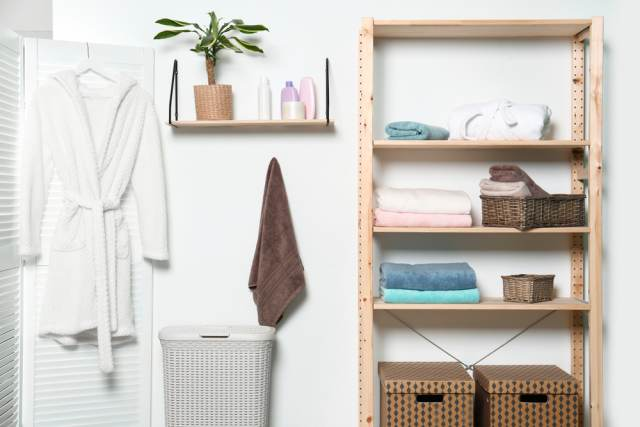
Corner cabinets, hooks behind doors, and thin cabinets with gaps between pipes can all increase storage space without making a noticeable difference.
5-Step Efficient Storage Method:
Category: By usage frequency;
Customization: Storage compartments are designed according to the dimensions of the items;
3D: Utilizing walls and corners;
Gaps: Utilize every “blank” corner;
Organized storage: Items are both easily accessible and neatly arranged.
Proper storage not only makes the bathroom look tidy but also facilitates smoother overall “furniture and space management.”
V. Visual Expansion: Making Small Spaces “Look Bigger”
Color and material selection
Using light colors (such as white, beige, and light gray) can visually expand a space; reflective materials such as mirrors and stainless steel increase the sense of openness. Data shows that for small bathrooms, which are typically 36–40 square feet (approximately 3.3㎡–3.7㎡) , using light colors and reflective materials can significantly improve the feeling of “crowding”.
Lighting Design Secrets
Basic lighting : uniform brightness throughout.
Accent lighting : vanity lights or main light source for handwashing areas.
Ambient lighting : Soft, indirect light sources.
Using large mirrors, frameless designs, or glass partitions instead of shower curtains can make a small 3㎡ bathroom feel more spacious.
VI. Frequently Asked Questions
Q: What is the minimum comfortable bathroom size?
A: Generally, at least 2.5 square meters (approximately 27 square feet) is recommended , enough to accommodate a basic three-piece bedding set and ensure sufficient space for movement.
Q: With a limited budget, what should I prioritize renovating?
A: We recommend prioritizing layout optimization and storage systems; these require less investment and yield quick results.
Q: How can I avoid making the bathroom feel more cramped after renovation?
A: Adhere to the “less is more” principle, use a unified light color scheme, choose visually light furniture, and maintain sufficient movement space.
Q: Is DIY renovation safe?
A: For plumbing and waterproofing, we recommend hiring professionals. You can lead the design portion.
VII. Summary and Action Recommendations
Renovating a small bathroom isn’t a contest of luxurious design, but rather a challenge of “spatial wisdom.”
The key is:
Reasonable layout > Area size
Wall-mounted and multifunctional furniture = freeing up small spaces
Vertical storage = freeing up floor space
Color + Light = Visual Expansion
Start by measuring your existing space and recording your usage habits. Prioritize – begin with layout optimization and storage systems, then gradually upgrade the details. You’ll find that even a small bathroom can become a fully functional and pleasant space in your home.